Toys

Roping Dummy

My son wanted to learn to use a lasso, so I built us a Steve the Steer to play with. I have no desire to rope a live animal, this is just something fun to fiddle with in the backyard.

I was cleaning out the garage when I realized I had the parts on hand to make a dummy. The head was a scrap of 6×6 that I sculpted with a SawZall, bandsaw, and sanders. The horns were Hoppium IPA. The yellow strap on the head is a bit of climbing webbing, used to stabilize the horns. The body and legs are just 2×4, but I ran out, so he only has a single leg in the back. The next step is to add skis so one of us can drag him around while others try to catch him.

After I got the idea for the Mission Control Desk, it almost immediately occurred to me that we should have a spaceship of some kind to go with it. My son really did need a desk for school, though, and I had to finish that before starting on the spaceship.

This spacecraft is my favorite project ever. Not only was it challenging and educational for me, it will be great fun for the boys, while also encouraging them to work a lot of teamwork into their play.

You can read more details at the original post on the Makezine site.

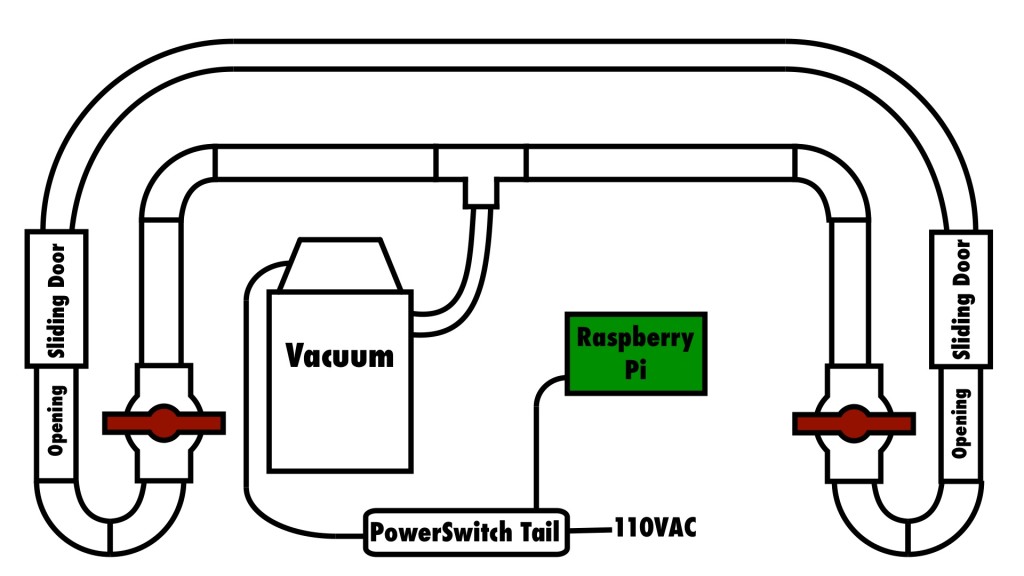
Faced with a wiggly-toothed toddler, I realized that we’d be starting the old Tooth Fairy routine soon. Being a bit of a non-conformist, I began to dream up non-conventional ways that we might carry out the Tooth Fairy tradition in our house. I decided that the Tooth Fairy was probably getting overwhelmed by the increasing world population, and would appreciate it if we could send the teeth directly to her. I installed a pneumatic transport system in my house to make it happen.

PTS System Diagram

Check out the full post on Make for more details.

Tiny Treehouse

Tiny Treehouse

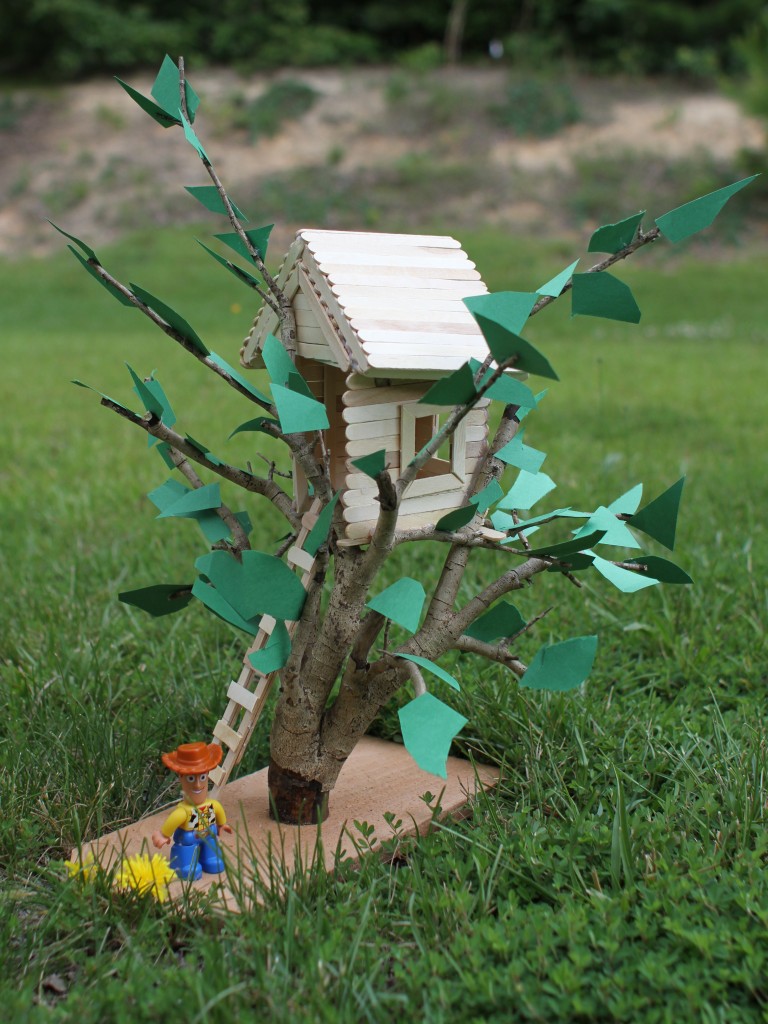
Having spent the week away from home, I returned with an itch to build something. When the boys started making treehouses out of Duplo blocks, inspiration struck. I grabbed the saw from the garage and walked out the woods where I found a suitable dead branch. Back in the garage, I quickly screwed a scrap of cedar to the bottom of the branch and then picked up the glue gun and the craft sticks on the way back into the house. The boys placed a fair amount of the sticks after I had applied glue, and they cut out all of the leaves. It was a fun afternoon project for all! A few weeks back, Gavin asked me to build a treehouse, and though I think this technically fulfills my obligation, I’ll still help them build a human-scale treehouse some day.

Coke Can Jet Ski Steamboat

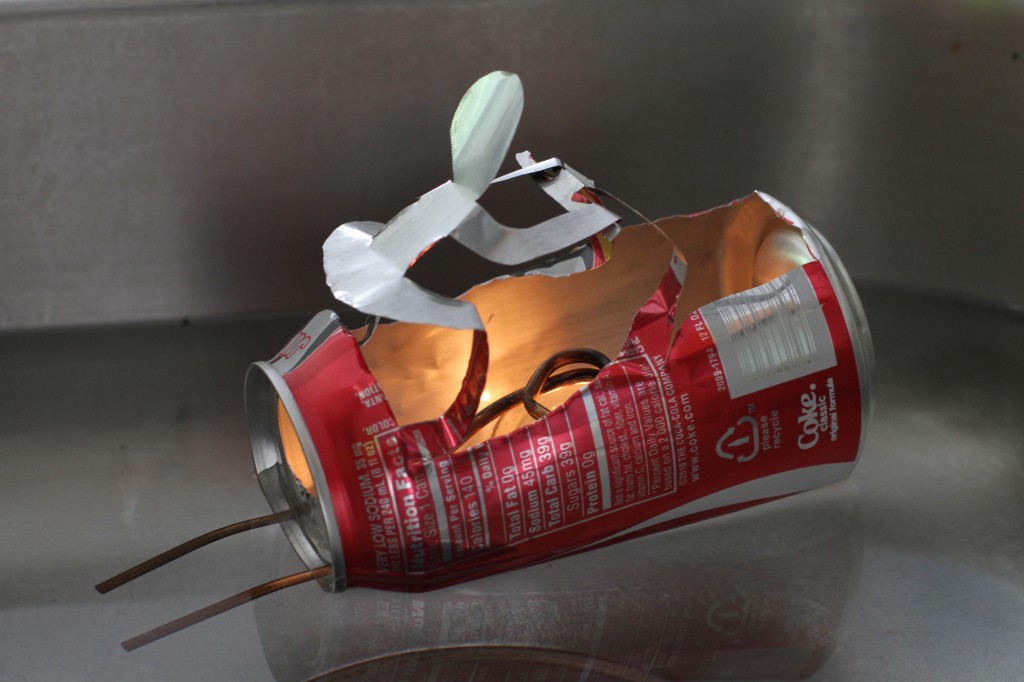
Using a tea-light candle for heat, this little feller slowly putt-putts around. The can is still in one piece. I cut the opening so that the fold-out parts form the rider and the handlebars. Eighth-inch brass tubing is coiled over the candle. To operate, I just fill the tubing with tap water and then cap the ends with my fingers while submerging them to keep the tubing filled. I then light the candle. The heat expands the water, which pushes the boat forward. Colder water rushes in, and the process repeats, resulting in a vibrating putt-putt locomotion.

Anapestic Tetragraph

Around this house, we love the books of Doctor Seuss. They’re easy to read (with the exception of Fox in Socks, one of my favs), have great messages, and contain fun illustrations of crazy contraptions. The books almost always follow the same poetic meter, anapestic tetrameter. During Dr. Seuss Week a couple years back, I was moved to write a book in anapestic tetrameter, featuring Gavin and his favorite stuffed animal. Traci took pictures to match and we published it on our family website as The Ape in the Cape.

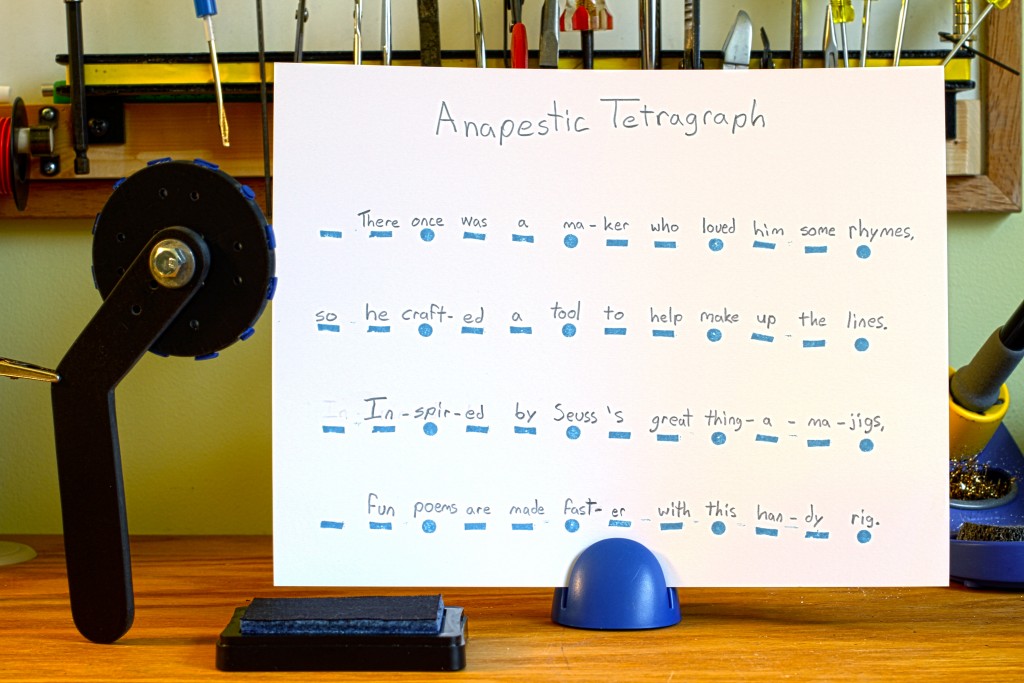
This year, inspiration struck me in the form of a tool that would help people learn and use anapestic tetrameter to write their own poems and books. I call it my Anapestic Tetragraph.

Anapesetic Tetragraph

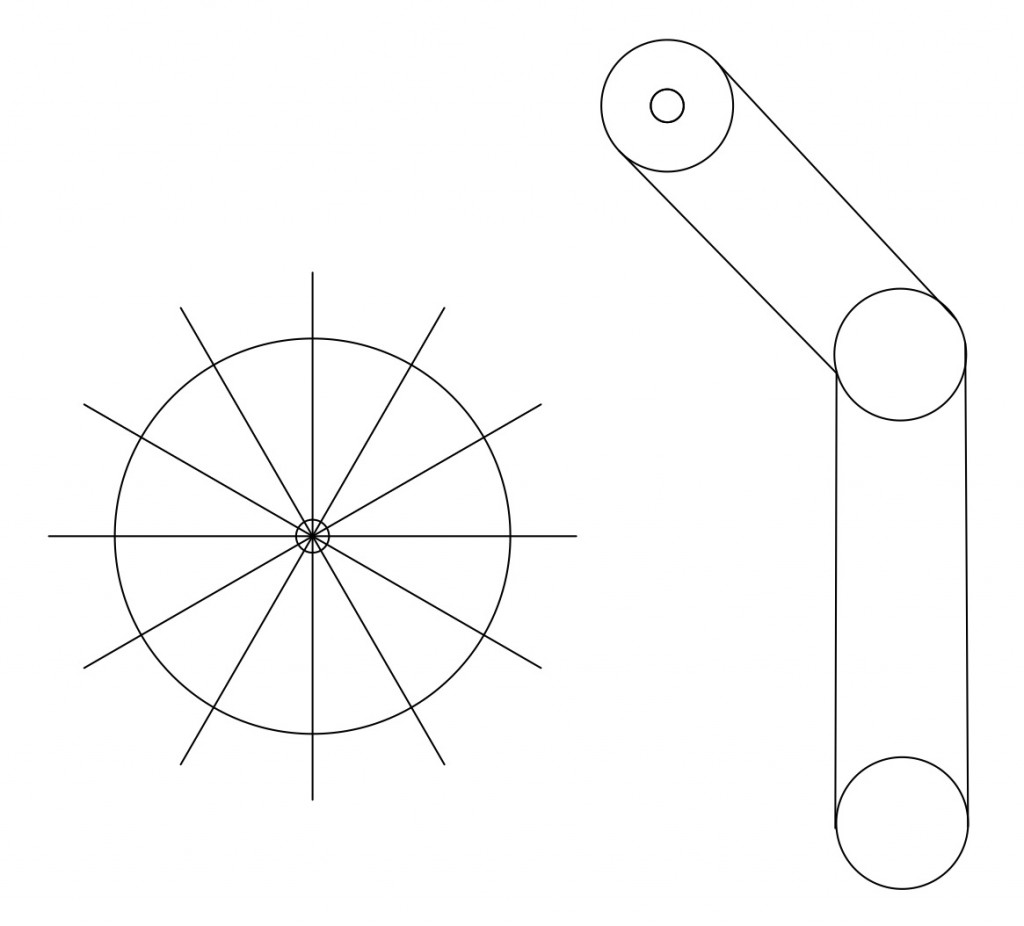
By rolling it on the ink pad and then on the paper, you can quickly set up a guide that tells you which syllables should be stressed. It’s nothing more than a homemade stamp roller, I know, and the marks it makes on the paper aren’t anything you couldn’t sketch up with a pencil. I had plans for the tool to make the sounds of anapestic tetrameter as it marked them, but I couldn’t scrounge anything suitable to make percussion sounds in such a small package. Plan B, optical encoding and electronic sounds, didn’t account for handle orientation and got scrapped during the breadboard phase, though you can still see the holes on the wheel and handle. Plan C was a complex series of tiny switches hand-made from guitar string, but that was getting too complex for such a simple and silly toy. I’ve ordered some microswitches for plan D. When those arrive, I’ll see if that plan works any better.

For the device’s construction, I used a CAD program to make templates for the shapes and the positions of the stamps. My scrollsaw made quick work of cutting the templates out of 1/4″ thick expanded PVC sheet. I cut the individual stamp bits out of thin craft foam using scissors for the “ana”s and a whole punch for the “pest”s. Hot glue holds the stamps to wheel.

Anapestic Tetragraph Template

As it is now, it’s still lots of fun to use. You just roll it on the stamp pad to ink it up, then roll your paper. As infrequently as I write poems, I need all the assistance I can get. It definitely helps to have the meter down first as a guide. Make your own and have fun writing some poems.

Dispatchatron Junior Portrait

As a Christmas present for Jasper this year, I made him a smaller version of my Dispatchatron invention, sized just right for the train table. Dispatchatron Senior was rather large and had to be put in storage when we could no longer spare the space. Dispatchatron Junior, however, can fit in a hat.


In short, the Dispatchatron Junior monitors the computer-voice (no humans) dispatch radio frequency of the county fire department and launches a toy fire truck onto our train table whenever the county dispatches a real fire truck. Even though the radio dispatches are just a computer voice giving addresses and unoffensive descriptions of the problem, I normally keep the volume just loud enough to be an effect, not loud enough that the boys will start parroting the dispatches.

I was inspired to make the Junior version after seeing a handheld car launcher for sale in Target. The dime-sized car uses a capacitor which is quickly charged (in 5-8 seconds) by two AAA cells in the launcher. One button charges the car, and another button levers down a gate, releasing the car.

Micro Chargers Package

To incorporate the toy into my contraption, I cracked it open and replaced the charge switch with a relay & transistor circuit to be operated by a microcontroller. I discarded the release button and connecting rod, leaving only the spring-loaded gate. I drilled the bottom of the launcher case and put a tiny eye-screw into the bottom of the gate. I mounted the launcher to the plywood base of the fire station, having cut a slot in the base to allow a string to run from the gate eyelet to a small servo.

Servo Slot

The small ham radio handy-talkie is mounted to the base with a scrap of thin aluminum. The microcontroller is an Arduino MICRO that I won in a trivia contest on Adafruit’s Ask An Engineer show for being the first to answer the question, “What material was used to make the case for the NeXT Cube?” I attached a light sensor (a light-dependent resistor) to the status light on the radio, so the microcontroller can sense when a radio call is coming through. When a dispatch occurs, the radio sends the live audio out of its speaker and simultaneously lights the status light.

Sensor and Servo

Inside the Fire Station

Here’s a quick and dirty diagram of the circuit layout:
Dispatchatron Junior Circuit Diagram

In the future, I might consolidate the various batteries into a single one with multiple regulators for easier recharging.

The code for the Arduino MICRO is quite simple:

// Dispatchatron Junior

#include <Servo.h>

Servo carGateServo;
long lightLevel;
long lastLaunch;
long ambientLight;

const int lightSensor = A5;
const int launchRelay = 11;
const int GATEDELAY   = 600;
const int CHARGEDELAY = 5000;

void setup()
{
  pinMode(launchRelay, OUTPUT);
  pinMode(lightSensor, INPUT);
  digitalWrite(launchRelay,LOW);
  Serial.begin(9600);
  carGateServo.attach(3);
  carGateServo.write(50);
  lastLaunch = 0;
  ambientLight = analogRead(lightSensor);
  Serial.println("Setup complete.");
}

void loop()
{
  // Record the light level from the sensor...
  lightLevel = analogRead(lightSensor);
  // If the light level has increased AND it has 
  // been a minute since the last launch...
  if((lightLevel > (ambientLight+100)) && ((lastLaunch + 60000) < millis())) {
    // Wait until the radio dispatch is over...
    while(analogRead(lightSensor) > (ambientLight+100)) { // While the light is on...
      delay(500); // Wait another half-second.
    }
    launchCar(); // Then launch the car when the light goes off
  }
  delay(1000); // No need to waste energy checking too often
}

void launchCar()
{
  lastLaunch = millis(); // Record the time of this launch
  digitalWrite(launchRelay, HIGH); // Charge the car
  delay(CHARGEDELAY); // Wait for the car to charge
  digitalWrite(launchRelay, LOW); // Stop charging the car
  carGateServo.write(100); // Lower the gate, releasing the car
  delay(GATEDELAY); // Wait for the car to leave
  carGateServo.write(50); // Close the gate to allow reloading
}

I built the fire station walls and roof out of thin plywood and painted it with a simple brown and red mix of kids’ craft paint. I pencilled in brickwork with a white pencil and (somewhat sloppily) painted the name of the fire station on the front. The car that came with the launcher was a yellow, rocket-powered, Prius knockoff. I painted it to look like a fire truck using glossy red and silver craft paint. Neither paint job is perfect, but both are plenty good enough for a two-year-old.

Now the boys’ daily train play is augmented by the occasional excitement of a toy fire truck driving itself around the table.